Building a Van in Stages
- Korey

- Mar 20, 2021
- 4 min read
Updated: Mar 18, 2023
We get this question asked to us a lot. We generally don't recommend this as like building a home in stages makes things complicated and a van is no different however we get that this question mostly arises due to budgets and/or time involved. If you are going to do this we have some recommendations in regards to practical things to do to get your van to work. We are going to focus on the practical most impactful things to do and most importantly in the right order. Just like building a home...you need to do things in the right order. (This isn't upgrading your wheels and tires)
PLAN AHEAD
Stage 1 (get your van useful; generally 6-12k)
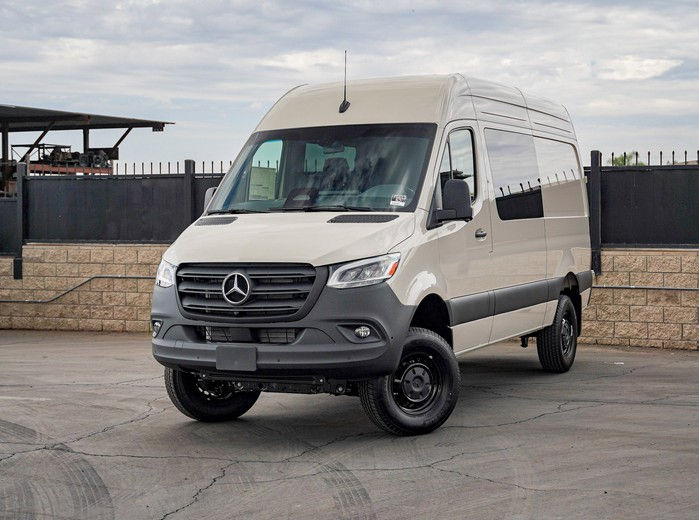
If you want to get up in running quickly, as we recommend start with a Sprinter Crew or Passenger van, it has 90% of the walls, floor, and a head liner, seats, windows, and front table system. Most of this does not require you to take the van apart and can be done in stages.

You can easily transform this into a campervan quickly by:
Do
Installing a bed, vented windows, and if a crew van paneling the rear quarter of the van so you don't dent the side of your van from the inside and it will quiet it down a lot. You have to get air in your van (its hot) and a fan is useless unless you have windows with screens. So start with the windows, and those vented windows dictate where your fan will eventually go. You need a bed so you can store gear underneath and that's what makes a camper van and a bed makes a camper van. Lastly, panel those exposed walls, a dent in your van is very expensive to fix or in some cases cannot be fixed easily or cheaply. If you are going to install pill windows or vented windows do that as well before paneling is ideal.
AMA Vented screened windows are easy replacements on to factory oem windows.

Popular CRL Pill Window

CRL Large Pill Window

Adventure Wagon bed, rear quarter panels with window insert. Upper storage, fan, lights must come in stage 2. (van must be taken apart)

Swivel seats and Lagun adpater mount with Lagun arm and table.

Not Suggested
Roof Rack...yeh we get it you look cool, however you should put your fan and solar gland prior to putting a rack on, otherwise it all has to come down. This is ok...but your going to have to pay twice or take your rack off. You also need roof rack rails on a Sprinter to install a rack. You might realize after installing solar panels and a fan...you have no roof rack left and just dropped 4k...so pay attention to your actual open space on your roof rack, especially if you are going to put solar on. Keep in mind a roof rack will ad some noise as well and reduce mileage a bit potentially depending on the roof rack. We recommend this to be one of the last things on your van if you plan on having a rack with a floor. This is not so important for many of the modular racks that have no floors or the floors are removable.
To maximize space special solar panels are used to run along side the roof fan


This pic shows how quickly rack space is taken up with solar panels

STAGE 2
THE "REAL" BUILD, beyond the eye candy
This stage really is the part that elevates a camper van to another level. Its also the most complicated and often times most expensive. It involves cutting holes (other than for windows), running electrical, and any support structure needed for cabinets, beds (depends on type), fan, and solar. This step requires often for your van to be completely apart even for a fan install in some cases. This is where the planning is real important.
Fan- Huge game changer. Now that you have your windows in (so you can get cool air from inside to outside) you often times have to remove some if not all of your headliner. When you have the headliner down, you should be running all of your electrical and any support structures for cabinets or bed if needed. Its like taking your drywall down in your kitchen - its the time to run gas lines, electrical, support for cabinets...a van is no different
Wiring/AUX battery - this is the time to do this step, you need the van empty to run wires
Wiring/Fan

Support bracing and Insulation

If you have a rack or solar you might have to relocate your XM antenna

Your floor needs to come out as well sometimes to run wiring

All wired into a central locaton...

Includes wiring up aux batteries as well and running those wires through firewall, floors, walls

One all of your wiring is in place, insulation, sound deading, and switches are done, its then time to start putting the van back together. This is the stage that is very time consuming and most technical.
It pretty much looks like nothing was done, but in reality this is the step that burned a ton of hours and materials costs. Then its time to put it all back together and finish the interior. Just like after drywall is finished in a kitchen remodel things go back into place and it starts to look like a kitchen or a complete van


.png)


This write up makes more and more sense as I continue to research. Thanks for the tips.
This is amazing. I am in planning to get a van but I just learned alot from your site. This is amazing. Thank you for doing this and explaining why and how's and comparisons.