
.png)
2023 AWD Sprinter Cargo Van Weekender Build for Family
- Korey

- Apr 19, 2023
- 24 min read
Updated: Nov 7, 2023
We got a hold finally of a 2023 AWD Sprinter 144 van. We started with a cargo van as passenger and crew vans were nearly impossible to find. We picked this one as it was ideally suited for families. It was unique. Rear Heat duct, power door, heated seats, 360 camera...all of the right stuff but even at MSRP it was over $82k out the door as it was very well equipped. We wanted to focus on showing how we would build the ultimate weekender that would provide modularity for multiples uses, maximize comfort and convenience, have a huge amount of storage, and the ability to sleep 4 and seat 6+ people. Do this with safety in mind and with features that would be similar to vans that exceed $200k.
What do we have planned? Van Speed Capsules, Fully capable lithium electrical system with solar, alternator charging, inverter, shore power, and 270ah of lithium power! More than enough for a weekender. Other goodies planned L track floor, Z bed, Outside Shower, Starlink capability, modular captains chair seating, and even some eye candy such as an Aluminess Roof Rack, Ladder, and larger wheel/Tires to make the van look cool. :) A pretty big list which will likely put this van in the mid 100's pretty easily. Parts on this build likely to exceed well over $60k alone and 250+ build hours (pro speed).
We document our demo builds as these will be for sale eventually and the build blogs are a great way to show the detail and value of the build compared to many vans for sale that look the same but greatly differ in overall build quality and detail. We could easily save 10-15k by taking shortcuts and have the same "look". The van however will not perform, sound, or function nearly as well in a lot of different ways. It also shows the van isn't all hacked up behind the walls or poor quality materials are used.

What we started with, but with very important options-rear door oem windows, heating duct, 360 camera, upgraded lighting, upgraded and heated seats, safety package, hitch, comfort adn safety package, and even a full sliding door to make in/out with kids easy. An empty shell otherwise.


First things first...let get ready for some larger wheels and tires. Its always fun to put on cool wheels. You cannot just bolt larger tires on a Sprinter. They don't fit. You have to modify the fenders. We don't use the typical fender mods as they don't let you widen the rear fender area as well. The Van Compass kit allows you to do this, but its a bit more labor and you gotta to some cutting.
You can see here when done, it still looks stock but WAY more room. We will be going to a 265/70/17 tire. Why; this give a bit more room for debris, snow, and won't rub. You can also put on a 265/75/16 tire on your "spare" and not have to use a super expensive tire carrier on your door. Its the same height as the 17" wheel/tire combo. We find the other popular size of 275/70/17 looks good, but it does rub on hard turn/articulation on rough roads. The practical size of 265/70/17 we find perfect as a more practical larger tire to run.
Rear Wheel Well modification- done, the rear of the tire now has an inch more room.

Front Fender Modification completed opening up the rear, way more room for larger whee/tire combo

265/70/16 BFG KO2 on Black Rhino Arsenal wheels. I find this size the best all around. You can go larger but you compromise in all around performance due to wheel clearance over rough terrain. Also you can put on a 2365/75/16 on your steel spare tire and avoid buying an extra wheel and don't have to put on a tire carrier saving thousands.

Full size spare tire 265/75/16 is same size as 265/70/17. We keep costs down using the steel OEM wheel and we could not put on a spare tire carrier on the rear door with 270 degree hinges and Van Speed Capsules with out a significant door stop or swapping out 180 degree hinges.

First things first getting ready for a roof rack you need to do some things FIRST before you start putting on all that eye candy just like before you put on wheels. We start by putting on a fan and solar gland for the solar panels that will go on later.

Then we wash the van to make sure ALL debris are off the roof. 99% of the time a roof needs a good washing and clay treatment. This was a brand new van...roof was horrible. So we gave it a very good cleaning before the roof rack will go on.

Then we are cutting in windows and finishing with OEM rubber for an OEM Look. AMA Vented/screen slider windows. Most window installs do not use edge trim vs OEM rubber to cut costs. OEM rubber trim provides a factory look with no seams. Its more difficult to cut the window opening using this trim.


and again...you need to wash the van to get all of the metal dust off 100% after cutting into the van. Yep no fast way to wash a van. It even takes me an hour and I have all the super slick tools like a professional foam gun. Hand dry to make sure its very clean.

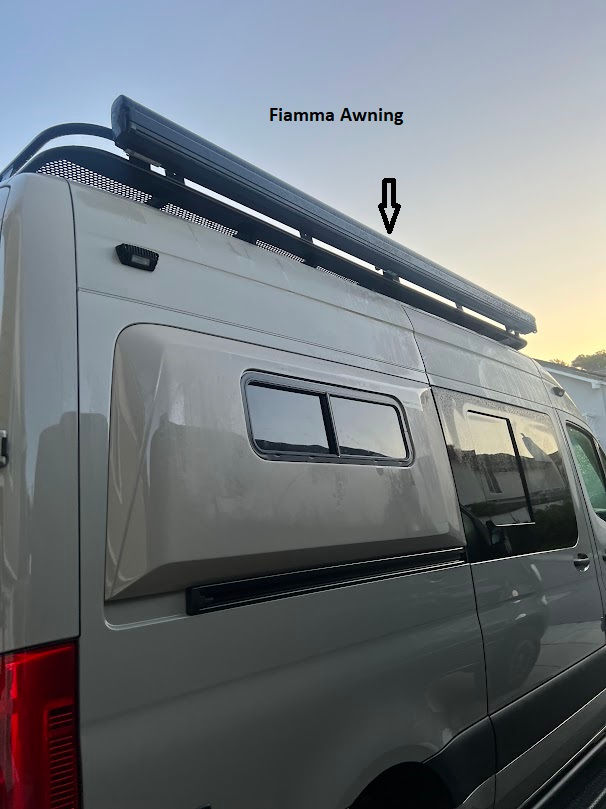
Its a lot eye candy in a very short time and a small fortune $. Notice this was all done in sequence...wheel fender mod, fan, solar, windows, roof rack, windows, blew way past $15k...very quickly in mods. Looks cool, but the real work is to come inside. This was the easy stuff and in comparison of whats to come a fraction of the build time. Aluminess roof rack with perforated top, double loop, and a Fiamma Awning. Cut out hole for fan was done as well. Solar panels will sit on top deck of rack.

Why is the fuel door missing? Notice? We pulled this off to use as a paint reference for the VanSpeed Capsules that need to be painted that will go on the back of the van. It's expensive and a pain to get them painted, but one of the many very time consuming steps needed to get this build together.

Aluminess Tread Steps - a bit easier now to get in


Ladder to get to the rack. Since the doors are 270 degree opening type, a ladder on the rear door will hit the side of the van especially once the Capsules are put on.

Water tank installed for the future outside shower, This is right next to the gas tank. Plumbing and pump to be installed soon. We put the water tank outside to save the inside of the van for gear and people.

Electronics- this is our configured "core" of the electrical system by Craft Autoworks. Super compact DC to DC charger, 2000w pure sine wave inverter, Shore power, DC panel, and solar charger all in a really small package. Just add connections-solar, alternator, shore power, and other various outlets. These are really nice super compact pre-loaded systems, really simplifies the installation of an electrical system and if there is a problem easy to chase down to component level and just swap out. This will easily run a microwave, hotplate, CPAP or charge an ebike. This type of system triples the costs at least of a typically DC to DC AGM system and takes up interior space. It also lays out very clearly all of the circuit breakers, fuses, and wiring. Power system is the #1 area for cost cutting and by far the most important part of a build.

You are looking at 10k in parts on this table...just a small example of how quickly builds ad up just in materials. Some of the audio, heater, and part of the electrical system, bracing, and a $600 roll of insulation in this photo. Not to mention putting this stuff in the van will require even more parts and a very significant amount of hours.

This is what your front doors look like. Many builds they don't do anything to the front doors-a huge build short cut saving a pretty good amount of money.

What do we do? Start with sound deadening with Dynamat Extreme. Unlike most of the sound deadening material this doesn't have tar based material. Take a smell of most of the stuff you see online used it smells like tar-cheap and sub par performance. If you smell that it cheap junk. Who wants to breath that stuff in on a hot day? Another shortcut using inferior product you see a lot. It helps, but not nearly as good as the stuff we use. However Dynamat Extreme is really expensive in comparison.

With 3M Thinsulate. You need to keep the center area clear for the window that comes down into the door.

Door panels and upgraded speakers as part of the audio upgrade. Adapter rings have to be used to get the 6.5 inch speakers to fit. We cover this as well in many of our other builds comparing stock vs upgrade. You don't need to go to a crazy speaker to get better sound but you have to insulate and sound deaden the doors otherwise you really cannot take advantage of the upgrade to it fullest. Its a very big difference when this is done. Speakers alone without sound deadening and sound dampening can still really sound not that great.

Audio and Heater upgrades require the front to be taken apart significantly. Lots of work and should be done in the first stages of a build for sure, especially if you are running speakers in teh back.

5 channel Kenwood Class D amplifier fits perfect under the passenger seat leaving room for the heater and if need be a fuse panel. Still have to wire in the sub and rear speakers when rear wiring for every thing is started. The system will have proper rated Kicker CS speakers and a 8" Kenwood subwoofer to fill in the base all connected to OEM head unit. Nothing crazy just a clean sounding system integrated. Its important to use properly rated speakers to the amp power. Its a fair amount of work to put a system into a van. L

We have the heater in position next to the amplifier. We only use Espar D2L heaters with automatic high altitude adjustment from an authorized dealer for reliability and warranty support in all of our builds. You pay more, but you get what you pay for. A huge mistake builders do is cut corners on their heater. Its way to expensive of an item to do that, not to mention the safety factor. Heaters made in China are just inferior if not plain dangerous. Webasto, which is a solid heater substitute however does not have proper high altitude fuel control, a very big negative if you go above 5,000 feet.

Got batteries will will use in this van. Very tech, very expensive Dakota smart heated ultra compact lithium batteries. This is a system we don't feel is needed in 99% of our builds, but in this van we decided to show what we would do for a fully featured "basic" lithium system. To put a system like this in is 3-4 times more expensive than our typical AGM system. No generic cheap brand stuff used here. 11 year warranty on these batteries! Not a big deal? Watch this video to find out what you might not know. We always say it's what you don't see that counts. Cheap Batteries We never take a short cuts in quality parts.

Lots of wiring. All of those switches, lights, and outlets have to be wired up some place. Here we are laying them out to figure where they will have to go to finally be connected to the power system.


An area often over looked is sound deadening and insulation. We spend a huge amount of time and materials costs to well insulated our vans. They are super quiet and very well insulated. Also make the upgraded audio system in this van sound amazing. Its a very large difference. We don't take short cuts with material.
Rear door

Front Floor


Since we have the slider door open, thought we would share another mod that is over looked a lot. We are putting DOT seats/mounting in back so it make sense for safety...


Sound deadening throughout the van as we do in all of our shop builds. This step makes a big difference, using the right materials a bigger difference, and putting in as much coverage as possible even more of a difference. Driving different customer vans, I can say confidently our vans are quieter than most for sure because of the steps we take to do this simple but very time consuming step along with insulation that is sound absorbing. Wiring now can be cleaned up more, insulation, and additional wiring still yet to be done at this stage. We always want to be able to service a van or do additional wiring in the. We don't use spray foam (horrible idea), or wool/denim as the sound absorbing isn't nearly as good as 3M Thinsulate.

3M automotive specific insulation can be put in place in the walls. The rear quarter panels will all be cut out so nothing goes there. We also put insulation in some of the cavities as well just giving it that bit extra. This entire step of insulation and sound deadening can easily take 20-30 hours for an entire van. Its super easy but really time consuming if you are doing more than just putting in a few patches in the van. This really is a much farther step than that. Makes a big difference compared to stock and really helps the audio quality. Next step is to handle all the primary wiring as its only pre-run at this point but not really fully wired in. Will have to be all organized and tidy as the next step. Shore, solar, and alternator power wires has to be ran as well as some exterior/interor lights need to be put on.


More wiring still. Mounted Zamp Solar panels to the roof rack. These are very nice low profile panels that can fit on the side of the fan to give a lot more open room on the back of the roof rack. They are expensive panels but worth the price both in quality and the unique fit to be able to be mounted here. You can access the roof via side ladder.

Wired in side outside Rigid lights front and back. All of this needs to be done when the van has no walls.


Also got around to making some of the custom panels for the van. I got lucky and found a headliner someone was selling out of a new crew van which will enable us to finish the interior easier at a more economical costs saving money and time. The headliner will take care of some of the curves and corner transitions easier.

Preparation on upper rear door panels. Another light for rear as well as speakers are mounted. All the wiring was ran earlier in the first part of the build for these items.

Finally got the Van Speed Capsules. I personally like the looks of these much better than Flarespace. They are deeper as well but you can't use CRL awning window on you slider. (not a problem in this build). These are color matched as well.

They are designed to go on the van a bit easier as well

Mounted/glued in

Now with CRL Pill windows

Passenger side. This is the side you can't use a full size CRL on your slider door, handle hits the capsule. One of the thousand things you have to figure out when building a van, usually from trial/error. The AMA window allows us to have venting on the slider door. A must have for cross ventilation.

Inside panels. These had to be modified and test fitted prior to upholstery. These are from Van Speed, but even then I had to modify them, not a direct fit.


Upholstered panels test fit. Starting to look more like a van, but a lot more work to do, only about half way done on this build.

Finally getting around to building a box for the power system and batteries. I wanted to keep this as compact as possible to leave more room for gear in the van. I was originally going to build a big cubby/cabinet but decided it was better to leave more room for flexible storage. Normally the battery would be in the hood (for a DC only system), but since this has AC/DC/shore/alt/solar power set up it has to be inside the van. I started with making this super small cabinet and testing out how it will fit.

After spending some time getting all the wiring to fit, it looks like it will all work ok, but its a very tight fit. This is a pre-fit. This will all have to come out again when the new floor comes in, but I designed it to be able to be removed with out to much work.

Also got around to pre-fit the bed panels. This is a basic bed, that's all you need as when you have flares/capsules you are not going to be really adjusting bed height. They of course are full removable. A bit more finish work is still to be done. This is all test fitting stages.

MORE ROOM/COMFORT- Front angle of bed. Towards the front side window I have about 4-5 inches of the bed towards the front than most beds of this type. If I did not do this, the person in the front kinda has a very narrow bed compared to the back. I hate that. Makes no sense to me unless you need that extra space for a rear stock seat. In fact on a Flarespace for example I have to cut 3 more inches of front/back width to get a stock bench seat to still work in the 3rd row. Since this van will have seating that slides front/back on tracks that will not be an issue. A custom mattress however will need to be made. I ordered a high end Roam Rest custom mattress specially to fit these capsule's. These have so much more space in them compared to the tapered Flarespace ones. The pre-cut panels however Van Speed makes are not the most ideal panel to work with. I have had to modify every one get them to fit ok. If you have a MOAB bed you really have to cut them up. Not a plug and play panel.
Just this bed and box took about 26 hours to get to this point even with all the wires "pre-wired". Still more work to be totally done with them. Just an example that van builds take a lot more time than you would think. It this is done at a very fast speed compared to a DIY for sure. I still have more work to do on the box and bed to get it dialed. It looks simple, which it kinda is, but really time consuming to get it all to fit perfectly, and these panels and box for sure do.


Plenty of storage, these semi rigid cabinets have more storage, lighter weight, and won't cut your head when you hit them when compared to normal wood cabinets. (you will)

These storage lockers are removable in just a few minutes

Additional storage under bed can be done as well with Semi Rigid Van Wife Bags or Campo bags hanging off of L track

Swivels seats are added as we come to a close on the build till we get our custom mattress and the Smart Floor system using the new track layout that is not yet available that will work with captains chairs as well at a new Z bed offering they are finalizing. This will make this van crazy flexible for any use and make it easier to sleep a family of 4. Build cost for this van so far are about $60k not including the flooring and seats which will bring this van depending on the type of seats around 160k.

110 outlet and a Victron battery monitor as well. The outlet on bottom is a 12v cigarette DC outlet for a fridge.

Finally got the custom 4 layer mattress made to fit this bed and the panels exactly from Roam Rest. Still waiting to be able to get the new flooring/seats and Flatline finally got their front shelves in again so I will be able to put that in next week. You can see the small "wing" cushions for the cut outs. All custom to fit perfectly and of course the panels are removable.

Delays and back orders even for builders are common. Finally able to order Flatline van co over head tray for the front as well as finalizing track layout for a new Z bed bench seat that will be offered later this year. This floor can finally be ordered (Smartfloor) and have decided to install 4 Smart RV Seats so that they will be able to slide under the bed to get out of the way, forward and back so that you can maximize leg room and layout, and even swivel. The seat allows you to fold it forward to make it "flat" so it can go under things. You will be able to fi 1, 2, or 3 in a single row.
The Z bed we wanted will be available end of this year and will go in just like the seats in second and slide forward/back. (no photos yet, it will be however like the travois bench/beds)
These flooring systems are really expensive, but ultra safe, give maximum flexibility in layout. I could have taken a less expensive route to seating, but I wanted to make sure this van had zero compromises and maximum safety in the seating layout.
Smart Seat RV

Finally ordered the custom 8 rail smartfloor and will be here in 3 weeks, just took 4 months to wait for this special floor rail layout. It will fit the seats in any position as well as the new bed. Had to however pull floor and electrical aux battery system out to get the van ready for the install. The floor and seating system is a small fortune, but will really put the van on the next level from a modular comfort level.

Got this in as well. A Starlink modified for 12v and a quick release mount. Just the parts for this your looking at $2k. We will install this, but remove later when the van is sold, but its will be a plug and play install with the new owner if they purchase a Starlink. This set up is available from STARMOUNT, send in you starlink...they will modify and sent it all back to you plug and play. Just ad power.

The modified dish (Star Mount Systems) fits nicely in between panels. Powerline is ran up through a gland with a SAE connector. You have to be very careful not to wire this incorrectly. It will burn out your dish. Yes hacking this into the mount voids your warranty.

Finally got the flooring system after many, many months of waiting. This is a Smart Floor with a custom 8 (common 4 and 6 track you see will not) track layout that will fit 1,2, or 3 seats in each row as well as the new bench/bed that will be introduced later this year. A lot if involved in getting one of these floors into a van as they are all custom made to order and can only be installed by an authorized installer. Ultra safe however. You don't just have to get the floor, you also need floor covering, seats, special installation tools, edge trim, and have a clean prepped floor. We are dry fitting this floor to make sure it fits correctly. It's all out of aluminum. These are very expensive (with the seats we ordered $20k installed with flooring, trim, insulation...) as you would expect and take a few days to install, but they give you ultimate seating and configuration options (super modular/flexible) with factory OEM level of safety. More to follow once we get this floor completed installed and the seats installed. (still waiting for more parts)

After much time prepping the van for install as well as pulling insulation into the floor cavities the floor has been installed and we have glued on interwoven vinyl marine flooring. (high quality superior to other floor options in our opinion, nice on the feet as well.) We still have further steps to do, put the L track in (over 160+ bolts) secure the flooring with some bolts for added safety, and put trim in. Then put the van back together again. Ideally this would have been one of the first steps we should do but the floor just wasn't available. These floor are super time consuming to put in. If you have a built out van with custom walls that cannot be removed you might not be able to install one of these floors as your walls have to be out to install or have wall panels that are stock oem thickness. You can see here the wall panels are removed. We planned for this when we built the van so it wasn't that big of a deal.

Million bolts later (L TRACK), edge trim, and electrical back in place the floor is finally installed.

Example of the flexible seating that will be in this build. Seats fold down so that you can put them under bed if needed. They can be positioned forward/backwards any place in van. This seat has the quick release base, however we will use the swivel bases. Those are back ordered however at the moment. This will allow maximum flexibility in seating.


One of the many different ways to set up the interior. I had a trip that we only needed one seat so this set up was used. Also made a custom mount for Lagun table so we can set up a table any place in this van. Truly a 100% modular interior. The sub box as well can be moved anyplace and you can even stand or kick it as its a down firing sub.


This is how your van really looks like camping!
Did a shake down road trip in the van. Did not get all of the seats nor the swivels yet but have one seat with a smart leg quick release mount. Three in the van, crammed with college dorm gear/supplies :), camping gear for 3 nights including a fire pit, and an assortment of other stuff. For this trip making things super simple used a cot for the 3rd sleeping area so we could still put gear under the 3rd makeshift bed. (works actually super well). Our trip back the van was empty and we picked up a bunch of parts from our friends at Colorado Campervan. We also got to test out the Starlink. This worked out very well in the National Park that had no cell or internet service. (good and bad thing :))
Our design ideas are based on how you actually use a van as a family. This van is at the very high end of what you could do with maximum flexibility if you have a large budget, but we do versions similar to this at half the cost. This flooring and seating system is 2/3 the costs of most of our builds. A great system if you have a cargo van with no seats or you want ultimate flexibility in your van. More pics to come once we finally get the other seat bases and we can really show how this van can layout.
Seat forward with cot

Moved backwards to create more room for hanging out and at night

This builds ads up, finally got to the cost breakdown of this build including the other 3 seats plus this one with swivels. Parts and van easily over $140k with 300+ hours into it so far. Its easy to do some bolt on eye candy on a van and make it looks expensive...put on some wheels, tires, lights, roof rack, a fan, and some walls and you think you have a super nice van, but those things are not what makes a super functional build that takes you to the next level in functionality. We always say its what you don't see is what separates an average build to a really nice one. This van is designed so you an put in a sink, fridge, toilet easily and take them out in minutes to give you flexibility for any type of use. We will go into this more once we get the swivel seat bases to demonstrate this.
PHOTO HEAVY SUMMARY OF KEY FEATURES:


Q and A - since I have been getting inquiries I thought I would answer the most common question about this van.
Q: Why is this an so expensive, seems over-priced?
A: Yes it is expensive, however not all vans builds are the same, it's what you don't see or know that makes a difference in what you REALLY are buying. We are actually selling this van well below what it cost us to build. A good example of hidden difference is read this article we posted that really shows differences in what seems like a similar van is actually really different. https://www.cacampervan.com/post/is-winnebago-adventure-wagon-a-good-van-a-review
Just like not all phones or computers are the same. Is an iPhone 7 the same as a iPhone 14? Is a $350 computer the same as a $2500 one? Of course not its what you don't see or know that separates and justifies price. As in example above the phone/computer might look the same but there is a huge quality and functionality difference. Its what you don't see that counts. I will just give a few examples...there are many others. We break down the build...shop the parts, tools, msl items, taxes, shipping, needed for install, not to mention the time to do the work and get the parts that are often back ordered. and it will become really evident how expensive a van built correctly costs. It's like a house, you thought your 10k kitchen remodel was going to be $10k and take you a month...ends up $25k, a year later and its still not done, vans are not different. If you have built one before you know.
Professional Documented build with a warranty- Can't tell you how much junk I see when people buy a used van. Shady work, parts, and materials. Not all the time but a lot of the time. There are very nice DIY builds and of course builders. Know what you are actually looking at. We have fixed at great costs a lot of messed up work. Sometimes it can't be fixed. Documentation and references count. I have had a lot of customers buy a van and find the seller ghosts them after the sale. Never answers questions, no warranty, they take the money and run.
Seating and Flooring-Unlike other DIY floors/seat set ups this floor is DOT approved. Super safe. It allows you to maximum flexibility with mounting points for anything, any type of style of seating allowing maximum legroom and layout. Captains chairs, sofaBed, or table check. Seats forwards, backwards, or sideways check. Ability to install a sofabed that has 3 point seatbelts and goes into a full size bed. Your stock floor or regular captains chairs cannot do this and cannot be modified to do so. You can with this system remove the seats or move them around and even install a full size or mini kitchenette making the camper layout just the way you want it. The seats with this van fold down and can slide under the bed even making the entire front open. This is a very huge upgrade, and most importantly extremely safe. Even fixed captains chairs and custom flooring can easily run you over 10k quickly. This floor is covered with high end interwoven vinyl that is almost a $1000 in materials. There is a big difference between this material and cheap stuff you find online or at home depot. Its not the same at all. These seats with swivel bases alone are $2500 +tax/shipping each! (check price vanland online) The floor and seating system are a very big costs that typically can be much less if starting with a passenger or a crew van trim, but you do not benefit with the unlimited flexibility and comfort of a DOT approved Smart Floor system. Adding additional L track for greater flexiblty, insulation, quality flooring cover, and trim make this system superior to factory OEM, but by far is one of the most expensive features in this build. It also makes this van next level in comfort and modularity.
Electrical- Yes, you can go cheaper, buy a Yeti or a Jackery, totally not the same as a legit fully featured electrical system on all. There is a very good reason professional builders do not use power generator systems in their vans. Performance, service, flexibility, quality of power (did not know that was important?), charge time, and durability. Each component can be replaced individually and easily serviced and diagnosed. The batteries used in this van have an 11 year warranty! ($1300 for each battery) You pay for what you get. On paper it might seem the same, it's not. There is a reason very few pro-builders use Yeti/Jackery type systems. Its like a gamer using a cheap computer, in the end it won't work well. The all-in-one systems are not made specifically for RV or van use, they are portable power supplies and work great for that and just ok for a van. The sytem in this van has 3 ways to charge, solar, alternator, and shore power all integrated smoothly. Most builds they just connect some solar panels for charging ..super big short cut in a build to save money and usually not sufficient to keep the house battery charged.
Bed System-Oversized bed, painted Capsules with windows, finished interior, custom mattress it adds up big time. Could have taken huge shortcuts here saving 50% in costs, but really at the expense of comfort and cosmetics. Could have saved thousands by not painting the capsules, using a smaller bed, not adding windows, and doing different interior trim.
Windows- Reason you don't see vented windows on those 100k vans? They are expensive, builder is cutting corners. You need ventilation, especially in summer when hot. It's an easy way to save money and not put any in and just install a fan, but where is hot air to go and you have no cross ventilation. Windows can be easily be $800-1600 each to install.
Heater- No China junk, Yeh, I don't want to burn the van down. Use quality components. Yikes! You would not believe the quality difference when you take heaters apart. Its a big safety issue if you saw the differences of build quality in heaters. Huge price difference between heaters that reflects this as well. Not an area like electrical you want to take a short cut on. Espar has high altitude adjustment build in and we get it from on authorized seller so its under warranty. If you don't Espar will not warranty the unit. Even this costs $500 more to get it from authorized dealer. Yes, that is important for an expensive part such as a heater.
Small Details big impact-Sound system, insulation/sound deadening, outlets, lighting, wheels, tires, Aluminess rack, modular storage, storage shelf, insulated window covers... Much of this stuff you don't see, but use and drive the van is a very big difference and it ads up to a very large amount of money. Tens of thousands of dollars. We provided very detailed build list specifically so someone could research the parts, add up the costs, include tax/labor/time for research, ordering, back order delays, and even install time pro or DIY. Hundreds of hours are into this build not including any of the typical time a DIYer would spend researching and then figuring out installation.
See before you buy- One of the largest advantages before building a van is to see it in person. Its one thing building a van in your head, its another seeing it in person. What the difference for example in insulation and sound deadening materials, flooring, seating, sleeping solutions? All of this can be overwhelming and large mistakes can be made spending a lot of money if you haven't seen something in person.
SEAT UPDATE
Big update, finally got the seat bases...now you can see why this van is so flexible. The Kitchentte is not included in the sale price.
Video Link for seat pics with captions
Layout with modular removable Kitchette (not included in sale)

Dinette configuration with two seats

Seats fold and can go under bed to make more room up front


wn seats allow you to slide them under bed

Passenger Mode

One of many configurations that can be done. You can do 3 across as well.

Chairs fold flat and can be used as a table

Stadium Seating set up, two of the chairs swivel

Stadium Seating

MORE MODS-optimizing flexibility and comfort in van
Speaking of Seat mods. Built a small panel that allows the bed to slide back 10 inches to give more room up front for the 3rd row seats. Put this panel back and you still get the oversized bed and slide or just fold down that row of seats when in full sleep mode. With a normal "flarespace bed" you do not have this extra room or you have a very small bed. I really wanted to be able to fit 3 rows comfortably.

This panel slides back to provide more room if using 4 seats in back with them behind each other

We went with the RV seat specifically so it can slide under or just lean forward to make a table or go under the bed. Its details like this that most of builds don't think about. You would never notice these details in any of the photos you see in vans for sale. Details matter. This van truly is very modular.


Paint matched vs capsules going to be soooo nice. Hope to see it next weekend!
excited for this 2023 awd build!!