
.png)
Building an Affordable Campervan (kinda): Our 2026 Project duplicating our $230k shop van for much less.
- Korey

- Jan 1
- 4 min read
THIS VAN IS COMPLETED...BUT THE BLOG ISN'T...ITS FOR SALE $146,000. Brand new van and build. Just a bit busy building customer vans, but photos of completion and video are at end of thread. This includes everything...including insulated magnetic window covers.
Finish Project Ready for a family! Finished photo below!

Introducing Our New Project!
We’re excited to share our latest adventure! We’ve sourced a new 2025 AWD Sprinter Crew Van. This will be the foundation for our next demo project. Our goal? To show you how to build a van similar to our $235k demo van but at a much lower cost. We’re talking about achieving the same main functionality for almost $90k less! While most pop-top builds are priced at $180k and up, we’re here to demonstrate how we can do it for much less. It’s all about making smart decisions during the build to keep costs down.
How Are We Going to Do It?
1. Start with a Van That Has Most of What You Need
We recommend starting with the Sprinter "Crew" trim. This model includes seating and wall panels, which helps keep costs significantly lower. Why? Because it has a few windows we can use, and we don’t have to invest in expensive crash-tested seating or build wall panels from scratch. We can utilize what already comes with the van!
Here’s a look at the stock Sprinter AWD Crew Van we’re starting with:
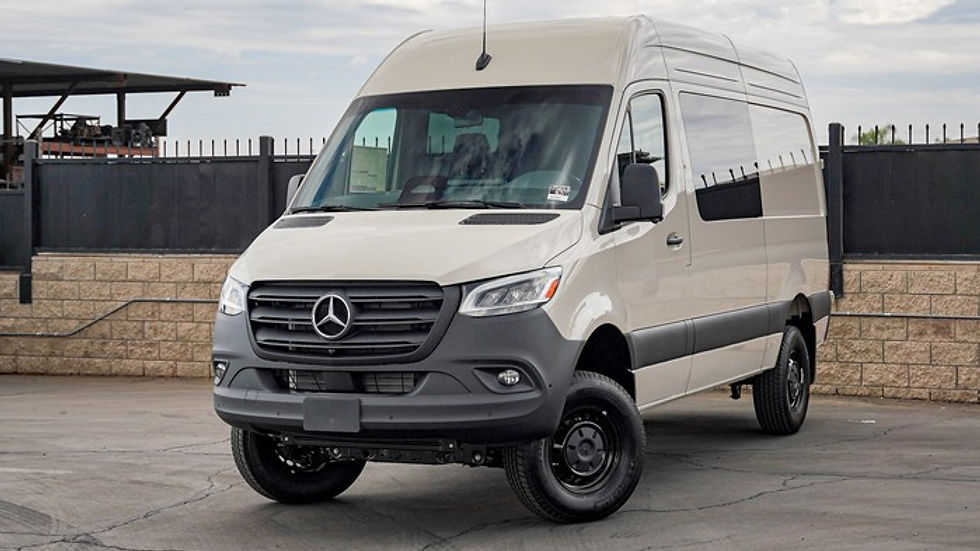

EXPAND THE INTERIOR, SLEEP 4+ EASILY
Cloud Cap - Simple Pop Top solution
Prepping a van for a pop top or in this case Super Pacific Cloud Cap requires careful planning and prep work so that it integrates into the rest of the build. Manufacture install videos are a bit deceiving they are edited significantly and make the install look like it takes a few hours when in reality to do it properly takes days, especially with fan/solar/headliner...
Some of the prep work for the Cloud Cap install, finish work for the pass through is a completely different step

Solar panel and fan pre-install prep

Adding a Cloud Cap; these require a lift to get on top of the roof safely w/o damaging van

Installed
Securing the solar panels, used solar adhesive strips under the panel and framed the panels with sealing RV roofing tape as well to insure secure mounting, but allowing removal if needed in future if needed. If we used other adhesive the panels would be very difficult vs difficult to remove. The fan as well requires a custom spacer to fit properly as well.

2. Keep Electrical Simple: DC Only
Next up, let’s talk about the electrical system. We’re keeping it simple and cost-effective. By placing the battery in the engine compartment, we can keep the interior free of bulky battery boxes and electrical clutter. This setup means we’ll have DC power only (12v), which is totally fine for running essentials like the heater, water pump, fridge, phones, and laptops.
This system will charge with the alternator and solar panels, providing more than enough power to run all the basics for weeks on end.
We’re using 224ah of AGM 12v power, with one battery on each side of the hood. This clever placement takes advantage of every inch of space and keeps the interior completely clutter-free. No boxes for electrical—just a clean, open space to enjoy!

3. Designing the Interior for Functionality
Using concepts from our foundation build we applied our most popular features in the interior of the van. Fully Modular, tons of storage, maximum functionality. The fully sound deadend and insulated interior also allow for a very quiet ride.


Seat shown in 3rd row with bed panel flipped up; the bed panel is also removable with 4 allen bolts. This allow you to either run two bench seats or move one to the rear to have more room up front w/o having to stack the bed panel. Modular. The bench seat is a bit tricky to get out, easier with two people due to its fits pretty tight to the bed. There is sleeping space behind the bench seat even in this position with the bed flipped up. Table can be used in this position as well

Front Position for bench seat (you can run two rows of bench seats) Table can be used in either position, front or back.


Video Overview
Build Specs:
Van Specs: 2025 AWD 144 high roof Sprinter. Silver Gray Color, leatherette, Comfort package, Driver convenience package, comfort plus package, MBUX package, Smart Phone wireless charging, 115v socket, Active Distance Assist DISTRONIC, Extra keys, 3 button remote, Blind spot assist, active lane keeping assist, parking package, 360 camera, with back up camera, Side guard assist, closing assist sliding door, LED headlights, tow package, rear step, grab handles, tow package, rear step...very well equipped with all the right stuff from factory.
Compatible with B20 biodiesel, ALL VANS PRIOR TO 2023 cannot take this fuel in California that is every place a VERY important spec that is a must have. Not available on older vans prior to 2023!
Fully modular, everything adjustable and can be removed easily
Some build features: (~$70k build cost+ cost of van; 160 build hours)
True Pop Top with inside entry - Cloud Cap by Super Pacific
Pro Breeze Fan with interior light and built in fan shade
Modular Interior-cargo/passenger/camper configurations, maximum flexibility
Tons of storage with semi rigid removable huge cabinets by Van Essentials
Fully insulated and sound deadening- ultra quiet van, all walls, doors, and floor are insulated
Upgraded audio- front/rear speakers added to help factory sound
Upgraded off road tires inc spare, for maximum traction off road and snow conditions (Falken Wild Peak)
Roost Vans Modular bed, adjustable height up to 36" with flip up kit, with high end mattress
Extended seat tracks for dual bench seating or modular seating (crash tested, DOT Approved)
AGM 224AH aux power system to power all of your DC accessories (fan, fridge,heater, phones, laptops...)
400 watts of solar power
Alternator charging
Vented/screened OEM look side windows- maximum 360 degree visibility for ventilation
Aluminess Side Steps for easy entry/exit- dog friendly/safe
Scopema Swivel Seats-maximizing interior space
Front Dinette for eating/hanging out integrated into bench seat
Outside water shower with 22 gallon tank-wash dogs/gear/people/dishes
Espar D3 AUX gas heater with high alt adjustment-keep warm in cold conditions
New portable Iceco fridge is included with purchase!
*build has full 1 year warranty
What a foundation build inside looks like w/o the stuff in it?


Comments