


.png)
2021 AWD Transit Pop Top Weekender Demo Build
- Korey

- Sep 10, 2021
- 11 min read
Updated: Jul 21, 2022
***SOLD*** We will have another one of these available Spring 2022.
FINISHED...OFF TO NEW OWNER IN NY!

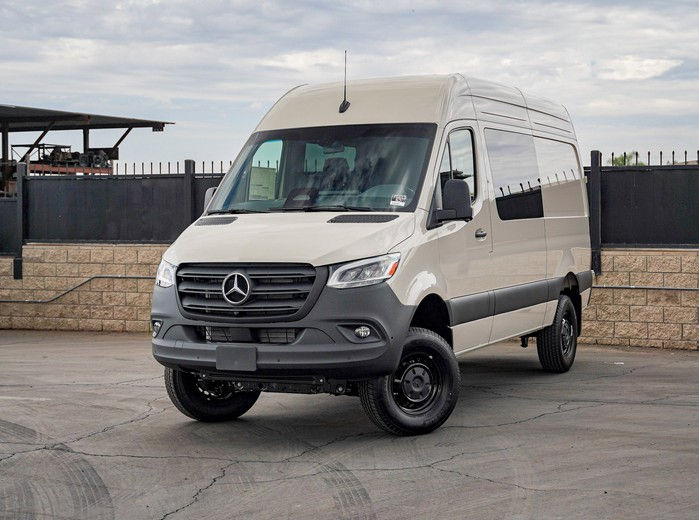
What this van started out as:

Starting out with new a 2021 Mid Roof Transit, this will be a similar to our 2020 Sprinter Weekender family build but keeping things a bit simpler and much less expensive. We start with the Mid Roof as the low roof Transit in my opinion is just to low. These vans are about 15k less to begin with. They have their limitations and are not as off road capable as a Sprinter but are a great platform for 90% of everyone out there. We we will improve ground clearance as we did in our Transit High Roof Build to make it more functional. (and look a heck of a lot cooler) It will seat 4 as configured (able to seat 5 with a different seat) and sleep 4 full size adults.
Here you see its just a bit higher than a low roof Sprinter. 4WD with a lift kit and larger wheels.

The Transit suspension requires some upgrades to gain ground clearance, we installed a Van Compass lift kit and shock relocation kit. The Transit is not as capable off road compared to the Sprinter 4WD, however this upgrade is perfect to improve the ride and run on dirt roads.


Also removed the super wide OAM 3 seater that is so wide you can't walk front to back and replaced it with a Transit 2 seater deluxe seat to give more room to walk around the van and allow room for more gear.

Rear floor as well is started. Its silly that the crew van does not come with any rear floor so one has to be made. We will cover this up and use the front stock floor to keep costs down on this build.

Started cut out for the rear pill windows. Since this will have a pop top and with a fan on the front part of the van it make sense we also add vented rear windows to pull cool air through along with the AMA vented front windows to have maximum air flow and ventilation.


Run the power line to the rear...where the aux battery will be located. The Transit does not have a great hidden place to put an aux battery like a Sprinter. In this build we are going to put a lithium set up inside the van in the back. This set up requires a bit more work than the typical AGM set up, and costs 3 times as much but will have more power and much greater cycle capacity. We will hide these parts in the rear bed cubbies.
Here we have the rear power line from the alternator to the rear aux battery. This van does not have the factory rear aux battery which is kinda useless for a campervan as its not isolated. The factory starter battery is under the drivers seat. That empty space shown is where Ford usually puts the extra aux battery. We dropped a circuit breaker here so that we can disconnect quickly and for safety as well as cut a hole for easy access to it.

Aux power line ran to the back as well as beginning to run some interior DC lines.

While we are running electrical sound deadening the interior and insulating will be done. We use Dynamat Extreme for sound deadening. Its a more expensive product, but does not contain asphalt/tar like cheaper products and provides a superior end result. We don't skimp either on the use of it, we use typically in most of our builds over 150 square feet just on the walls and roof.


Transit panels. Transit vans are not easy to panel, they have curved walls, hardened steel, much more difficult than a Sprinter. Not impossible, but way more time consuming. We are going to build a bed to sleep sideways, using the openings of the large rear window space we can get about 6' 1.5" of sleeping length...not to bad and with the Pop top up top that will sleep anyone up to 6"4 or taller we got all family members covered. :) These upper quarter panels especially with windows are very time consuming to do and super tricky. We managed to insulate and sound deaden them while maximizing width space for the bed and kept it looking super clean.
Clean trim finish around windows, by far the most difficult thing to do is trim around a pill window and get the hole cut out in the right space...it took a few tries on panels to get this right. Even the "pros" make mistakes, more than you think! It often takes two or three times to get something done correctly, its all a big learning curve, but a few tricks make the end result turn out clean.


Notice the curved walls on the Transit. Instead of using furring strips that reduce interior space we try to work around these to maximize usable space in the van. You have to keep the panels simple however to do this and material choice helps to pull off a clean panel. Uppers are done, lower panels we have to finish running electrical, insulate, then put them in place.

Interior walls are completed insulated and sound deadening. Electrical wires ran as well for the DC outlets, lights...

Moving to the headliner in the rear and upper wall structure that will have L track for the Campo bags later. Have to make room for electrical factory harness as well support structure for the L track. Front headliner is put back in temporarily until the Pop top goes in later.

So the headliner and upper rear panels are now done. In a transit these panels are a bit tricky and time consuming to get to fit right, one of the reason why they are more expensive to do than ones in a Sprinter. However this allow for L track to go in (once re reinforce mounting points for them and get things to clear electrical wires.


Light duty L track with Campo Bag for upper storage. Easily removable in seconds. You can fit up to 4 large bags in the rear as well as a mini bag...65" of storage space on each side keeping things real organized or use this mount for a Ipad to watch TV/Videos with a custom bracket. You can see we also added rear interior LED lights to run off the aux battery as well as we have cigarette lighter and USB outlets throughout the van now for power. Internet magic makes getting this far from a DIY standpoint pretty fast, but actually this took about 2 x as much time as a Sprinter and represents a ton for work to get these panels in and have all the electrical pre-wired. We will be finishing up the rear floor next to get the back all tidy before we install the battery system and then the bed...finally turning a corner to the back end of the build until we get the Pop Top on in a few months.


Insulating and sound deadening the floor with Dynamat Extreme and closed cell foam. We filled in some of the voids in the stock front floor piece with Thinsulate. We are using this piece to keep costs down and with all the styrofoam already there it actually already has insulation properties just needs to bit of enhancement and this keeps costs down. Our goal on this van is to build a nice van, but keep costs in check as much as possible while ending up with a very functional result. These builds are expensive enough...full floor replacement could easily be 2-3k...we cut those costs in half by working with what the van already has...the Cardiff Campervan build philosophy keeping it simple.

Dynamat Extreme under stock floor, this will really quiet things down a bit and reduce some of the exhaust drone.

Here in the rear we laid down Dynamat Extreme as well then a layer of closed cell foam. On top of that is 1.5 inches of wood floor and coin flooring...that's a lot of insulation and will keep everything really quiet.


Rear floor completed, we used coin flooring, not a big fan of this flooring, it tends to expand a lot but in a rear cargo area for this build was an economical choice. We prefer interwoven flooring but its 2 x the cost but easier to install and a much better feel and look.

A lot of DIYer's never insulate and sound deaden the doors...even 180k Revels do a poor job. Its a huge difference.


Transits don't have a easy place to put aux battery, one of the several things that make this van significantly more challenging to builds these vans. (ie time/money). Here we tried to keep space to a minimum for the battery bank. Since this is inside the van we can do Lithium, we went with 200ah of HEATED smart lithium power, battery monitor, DC to DC charger, and of course solar. This system will charge off alternator and solar. We will not be putting in an inverter (really no need to) however this would be fairly simple to add outside of finding space to put it. This will all be covered up in a bed cubby to prying hands or gear doesn't touch it. When using lithium you need a charge controller to control input current as well as these batteries really don't like heat or cold so they have to be inside. They are not the cure all, however they last 3-5 times longer than AGM, lighter weight, smaller, and give you more power to size. Cost however is WAY more...3-5 times as much depending on the system and what you are doing. We are trying to keep this very simple and compact so we did not get crazy with this set up. Its more than enough to power a fridge, heater, charge phones, run a fan, and LED lights with the solar and alternator charging them. Its almost 2 x as much power as we normally do with our builds so we are confident this will handle things very well. Unlike power battery banks (Goal Zero...) This won't have voltage issue with the sensitive electronics and the battery can be replaced or serviced easily.


Started as well getting the bed supports all worked out around this electrical work and all the curves in the window pockets. Its actually a lot of trial and error fitting due to the every changing angles at each height. In the end a clean solution was found and was able to get it all to work as well upholstered 1/2 the bed as start. These beds can easily take 30 hours to build, especially when like this van its a one off...a 1/2 height difference in this van the way it is changes all the cut outs needed to fit correctly.


Lots of curves, Transits don't have any straight walls unlike the Sprinter or Promaster vans.


Looking better upholstered


Its only half done, but the hardest part of the bed is dialed. Will have to make custom panels that will be removable, side end panels for the bed, hook up more electrical (solar controller), and of course as well make a custom mattress. I expect to get the bed at least done in the next few days and run through the electrical and do the programming of the DC controller and battery monitor. The bed isn't mounted in the below pic, this a mock up to make sure things look ok before moving on to next steps with the bed.

Getting closer to getting the bed fully mocked up. It has 3 removable panels to make room for larger items. Its high enough to clear coolers but low enough that you could sit on it and your head won't hit the Campo bags above you.

Left cubbie holds the batteries and electrical as well as has some storage space. On the right we will run L track to even hang more Campo bags with gear allowing even more gear to go on teh floor below the bed.

Installing the Espar Gas heater. These are much larger than the diesel heaters and much larger and more powerful than the Webasto heater. These are much better, but a lot more money. They come with controller that has a built in high altitude sensor which is a very important especially with a gasoline heater as they are much more sensitive to carbon build up compared to a diesel heater. These a bit more work as well to install compared to Sprinter and they are 50% more expensive. We managed to fit this under the passenger seat to save as much floor space as possible. With gas heaters as well keeping the exhaust and air intake as short as possible as well.

Getting closer to completing the main part of the van. Heater was installed and running. You have to drop the gas tank to tap into the fuel for the heater. Also your tank has to be at least half full to run the heater the pick up is really high and if you are around a 1/2 tank you heater might indicate a pump or fuel issue. Its one of the several things about Fords. The heater however is much larger than other brands and it pumps out a ton of heat...around 13k btu's. Overall it works great but installing a heater in a Transit is a lot more time consuming than a Diesel Sprinter figure this would be easily 50% if not more to install compared to a Sprinter if you use this quality heater and not something from overseas or from an over seas seller.
This heater is HUGE.


Fuel Pump

Lowering Gas Tank, looks like we will have to do this again, but fully drop it, as it turns out the factory gas pick up causes issues with aux heaters due to the size of the pick up tube. So this means we will have to completely drop it, take off the sending cap, drill a hole, insert the smaller diameter pick up hose, and put it all back together. :( This should solve the problem of fuel supply.

Front of bed with battery cover

Rear bed with floor trim.

Seat swivels and table system in as well for front dining. We used Scopema swivels, very low profile and fairly easy to mount. This van does not have a manual ebrake, if it did the driver swivel is really difficult to deal with. This raises seat about 5/8 an inch. You can't swivel the seats or turn them 180 degrees with out opening the door, again one of the many things that make a Transit not as "user friendly" as a Sprinter, but usually not a game changer. They hit the door when turning them. Some cutting is needed on the passenger seat and you have to get rid of all the protective plastic.


The bed panels remove easily and can be stacked as well. We still have custom cushions/mattress to be made to fit each panel to finish the bed out and add some L track for more campo bags below the bed.

Heater control as well got mounted...we had a few issues with the heater, as it turned out something very simple a wiring female plug issue. This heater has fault codes to tell you what is going on. Espar is a lot more expensive than a Webasto but in our opinion its a superior heater and puts out twice as much heat. We mount things as well in a way that service becomes very easy if needed. Small details but they really make a difference if you need to troubleshoot or work/modify the van.

Solar panel as well is mounted...once the pop top get mounted it just two wires then to hook them up. Everything properly with circuit breakers or fuses. Just a few more details before van is completed and waiting for Phase 2 in December with the pop top install.

Rear bed cushions completed. We use automotive grade microfiber and they zip off if needed for cleaning. Also trimmed out above the door, this helps keep the headliner as well in place on bumpy roads and stock interior lights as well can still be used.

Front door sound deadening, a lot of builds skip dealing with the doors, we always doors. Each van you have to do them a bit different in how you do them. We also use 2-3 times more material than most who do the doors and unlike most we do sound deadening and insulation. This completes the Transit insulation/sound deadening...the result is this van is really, really quiet.

Finally got tires...went to a different size than originally planned to BFG KO2 245/75/16 - this is 1/2" smaller than 255/70/16. It will provide much more needed clearance for snow and for off road, as well as a lot easier size to access...its really common. I think think this actually a much better size. No cutting or modifications needed. The BFG KO2 has excellent traction in snow and a great all terrain tire but on the more expensive side. Has the appropriate load rating as well for this van. Maximum safety. Looks good as well!
below stock tire is on right.


Aluminess Ladder/Tire Rack


On its way for a top and its new owner!

Finally the Colorado Campervan Pop Top gets put on to finish this build ready for the new owner! We are planning on building a few more of these spring/early summer 2022 and they will be for sale very similar to this build. (same color, similar features)


How much?